 This is the start of a 4wheel AWD tram with two 150 Watt motors. It may look like this...
 This is the start of a 4wheel AWD tram with two 150 Watt motors. It may look like this...
 Added 3A PPTC fuses (or Polyswitch) to the Li'l Big Hauler. These haver low resistance until a specified current is reached. The 'poly' film then rapidly heats and its resistance vastly increases. When current is removed the film cools, circuit restored... So they are really an auto resetting circuit breaker!

 Found a cheap Bachmann G gauge Li'l Big Hauler, and thought I could RC it with bits I have... So here it is with forward reverse with the RCS handset - and a directional headlight... Runs on 45mm track, and guess what... with 12mm rail head the distance between the 7 1/4 an 5 inch rails is 45mm!! Cute eh?
 I will need longer axles for the adjustable pillow blocks. The bearing centres are quite long. So I have put 75mm wheels on the standard sized axles with a simple suspension of 15mm pillow blocks, coil die springs and 1/4" bolts. This is for a small driving car... a 1 1/2 seater. It will have a simple rectangular frame of mild steel angle or RHS. We will see how we go...


 The Indian Red carriages so far. I used incompatible primer on one side of #1 and had to strip it and start again... bugga!
 First pair of coupler pockets for the ride-on cars. 40x40mm outside 32x32mm inside. 1/4" pins, per AALS 5"gauge standards. The mounting holes are 70mm between centres for 1/4" HT bolts through the buffer beam. Height above rail top 3 1/4" or 82.5mm to the centre of the pocket... Like this...
 |
| New buffer beams from recycled angle |
 |
| Welded cleaned up and painted |
 |
| Bogies back on with 1/2" UNC bolts as pivots |
 A decision was made by the SRR Board (me) that train carriages and locos on the SRR will be connected by 12mm, 6 pin plug/socket with multi-strand 6 core security system cable.


 |
| Toby's innards - Before |
 |
| Toby's innards - after |

 Aside from the minor repair, he has had a little bit of a makeover. How about a 3D face, a chimney, a steam pipe and a bit of paint - not too much as he is a working locomotive!!!
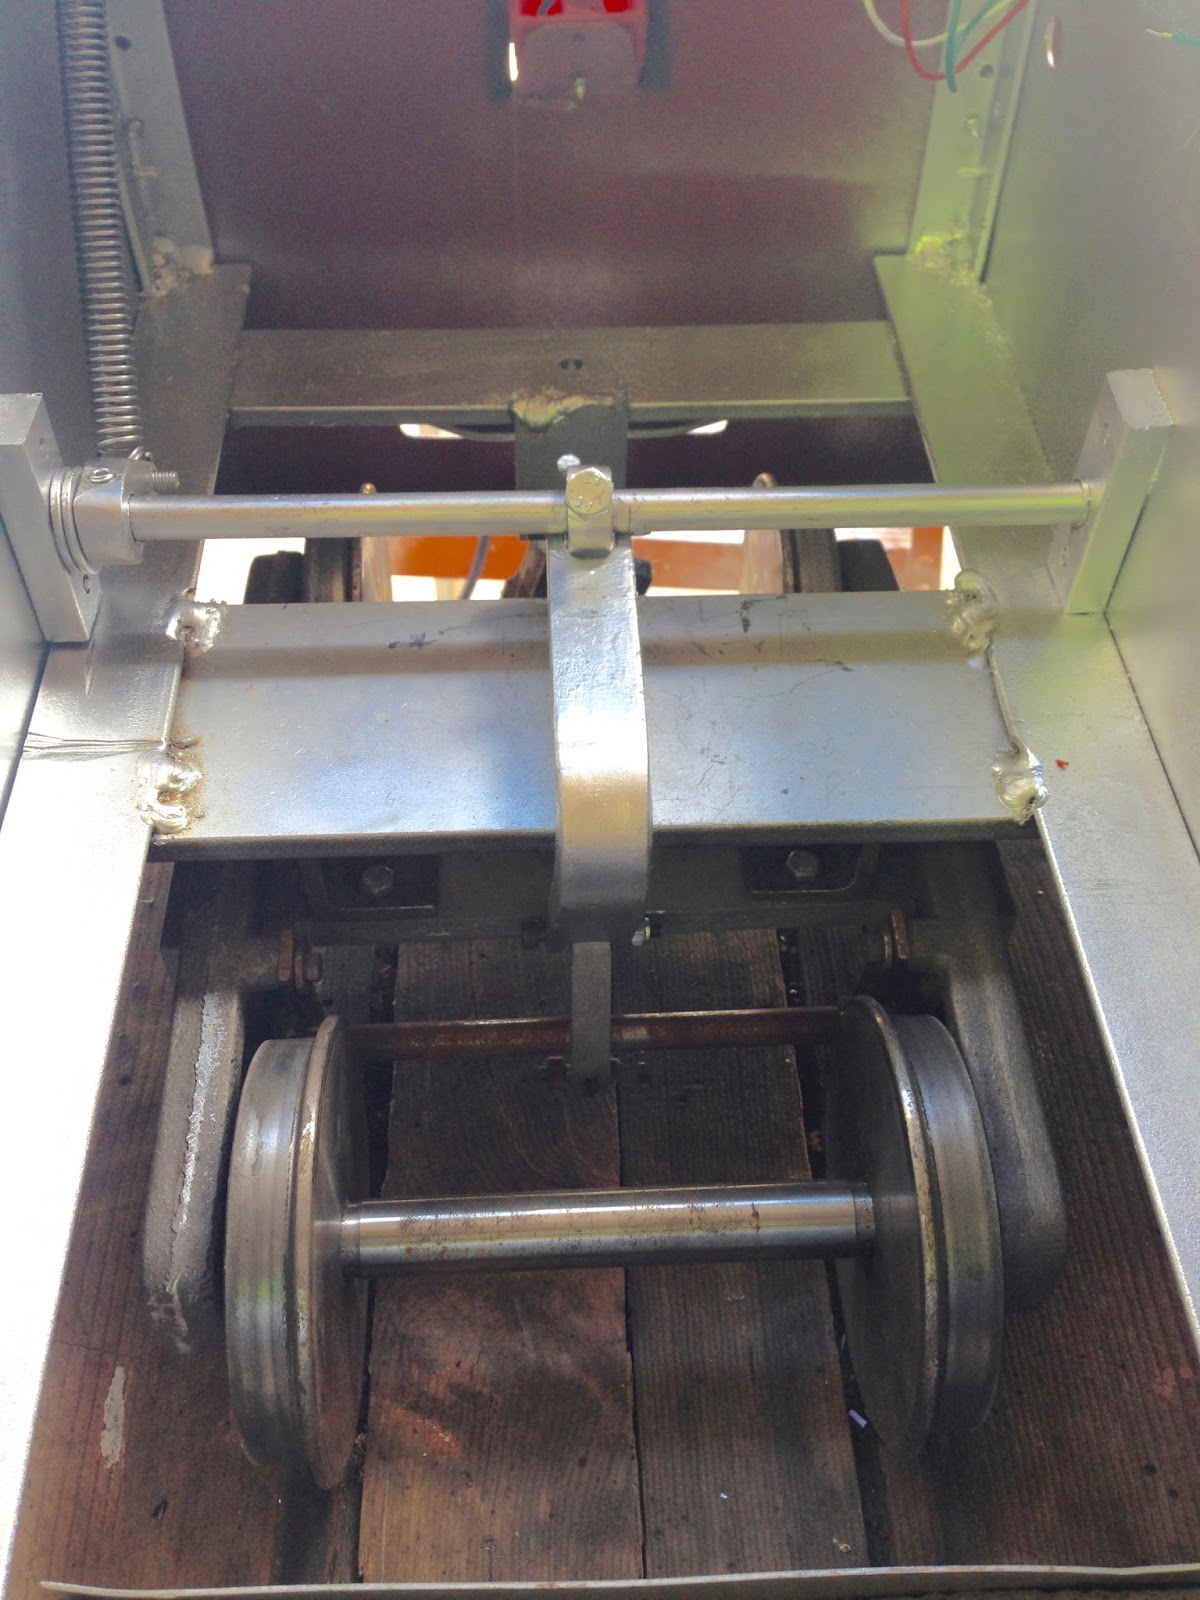 I have been working on SRR too. The ride-on carriage has been re-bogied with Warrick Sandberg mechanically braked bogies. The ride height changed etc. I finally decided what to do about connecting the brakes. Thought about cables, cams, levers... bearing in mind on the SRR track the curves are tight(ish) at 3.9metre radius and the bogies turn a fair bit.
  So ONE bogie now has FOOT brakes. I plan to build another carriage so will get a pair of unbraked bogies and use one on each carriage plus one braked version.
  The brake lever on the bogie only needs to move 5-10mm at the end so I roughly calculated the mechanical advantage, made a pedal on a shaft, a return spring and lever, a short activating lever, and linking piece out of an offcut of 20x10 rail. Grade 8 bolts connect it all.
 |
| This mess came out... |


 Both S bend kinks beside the house are finished. So the riding car with feet hanging out clears the water tank and the new slim shed.


